|
|
| MODEL KITS |
 |
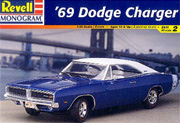
Revell-Monogram '69 Dodge Charger #2546
-or-
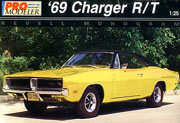
Revell-Monogram Pro Modeler '69 Dodge Charger R/T #5937
(Make sure this is the re-issued version, as the first
issue's body was designed incorrectly).
NOTE: Kit #2546 does not contain the interior
rollbar. You will have to create your own rollbar if this
kit is used. |
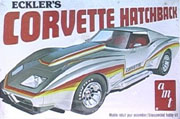 |
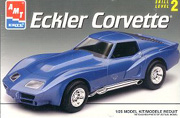
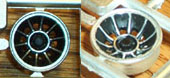
Correct American Racing Vector Rims from:
AMT/Ertl Eckler Corvette #8053
-or-
Older AMT kit #3102.
Both kits are discontinued. Watch for kits on eBay or
at retailers that sell discontinued kits. |
 |
If
the Eckler Corvette model cannot be found, wheels and
tires from the AMT/Ertl General Lee kit will work, . They
are slightly less accurate, but will look fine if detailed
properly. |
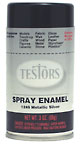
| SPRAY PAINT |
|
|
Wheel Preparation:
Testors #1260 Dull Cote
Primer:
Testors #2937 Gray Primer
Body:
Testors #1628 Competition Orange
Interior:
Tamiya #TS-46 Light Sand (excellent shade of tan)
-or-
Testors #1249 Flat Black (if preferred)
Finish:
Testors #1261 Gloss Cote |
|
|
|
|
| BOTTLE PAINT |
|
|
Engine:
Testors Model Master #2732 Chrysler Engine Red
Turn Signals:
Testors Model Master #2723 Turn Signal Amber
Small Details:
Testors #1124 Green
Testors #1145 Gloss White
Testors #1146 Silver
Testors #1147 Gloss Black
Testors #1149 Flat Black |
| PAINT MARKERS |
|
|
Small Parts:
Testors #2546C Silver
Testors #2547C Black
Testors #2549C Flat Black |
| CEMENT |
|
|
Testors Model Master #8872C Precision Cement For
Plastic Models |
| TOOLS |
-Exacto Knife w/#11 blade (sharp for trimming Bare
Metal chrome foil)
-Pocket or hobby knife for scraping and trimming small
parts
-Paint brushes for bottle paints
-Round tip toothpics for painting small details |
| CHROME |
| -1
Sheet of Bare Metal brand Chrome Foil |
| SANDPAPER |
-1
sheet of 240-grit sandpaper
-1 sheet of 600-grit sandpaper |
| PUSHBAR MATERIALS |
-1
sheet of .020" Evergreen brand Styrene
-1 package of 3/32" Styrene Tubing
-1 pushbar template from the January 2002 Scale Auto Magazine
(right click here, and click on "save target
as" to download the template) (Click here for pushbar instructions) |
| MISC. |
-Black electrical tape (for use as rollbar "padding").
I used tape that was 11/16" wide.
-White epoxy putty for plastic models (optional; for filling
side markers).
-1/8" diameter solid aluminum rod, at least 6" long (for
rollbar, if using kit #2546).
-Silicone adhesive (for securing rollbar, if using kit
#2546). |
|
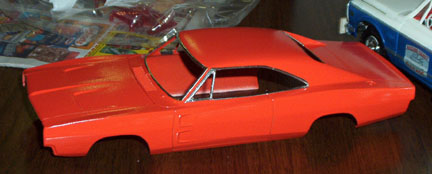
NOTE: THE MAJORITY OF THE
MODEL IS BUILT ACCORDING TO THE KIT INSTRUCTIONS, BUT
READ ALL OF THE FOLLOWING MODIFICATIONS BEFORE BEGINNING!
|
|
|
|
1.
|
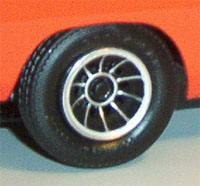
Spray vector rims with Dull Cote.
Let dry thoroughly.

|
|
2.
|
Using a toothpick, carefully paint the areas in
between the spokes flat black, as well as the wheel
centers. Take lots of time to avoid a sloppy job.
|
|
3.
|
When
assembling the wheels, use the wheel backs and tires provided
with the Eckler Corvette kit. Paint the inside of the
wheel backs black, as they show through the slots in the
rim.
 |
|
|
|
1.
|
Sand
the wheel well chrome smooth. I used the edge of a pocket
knife blade to scrape the main excess, then finished with
600-grit sandpaper.
|
|
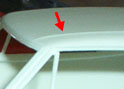
2.
|
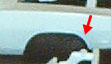
Sand
the roof texture smooth, beginning with 240-grit and finishing
with 600-grit sandpaper. I began the process by carefully
scraping the "seams" with the edge of a pocket knife to
flatten them.
 |
|
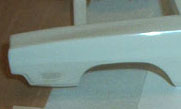
3.
|
OPTIONAL:
Use white epoxy putty for plastic models to fill in side
marker lights on fenders. Also fill back-up light holes
in rear valance. Sand filled areas smooth.
|
|
4.
|
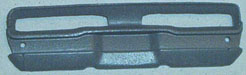
Apply a coat of gray primer to the Body, Hood,
Radiator Core Support (part No. 35), Header Panel (part
No. 5), Front Valance (part No. 3) and Rear Panel &
Valance (part No. 4).
After drying, sand any necessary areas again. Apply a
second light coat of primer.

 |
|
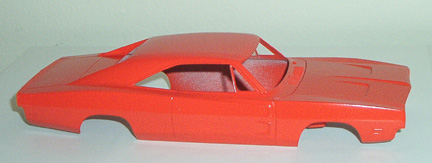
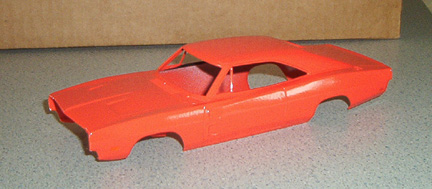
5.
|
Apply two coats of Competition Orange, letting
the paint dry thoroughly between coats. If necessary,
after the first coat, go over the body VERY lightly with
600-grit paper to even out any "orange peel." Also spray
the Radiator Core Support (part No. 35), Header Panel
(part No. 5), Front Valance (part No. 3) and Rear Panel
& Valance (part No. 4) Competition Orange.
 |
|
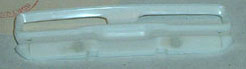
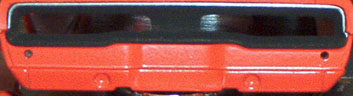
6.
|
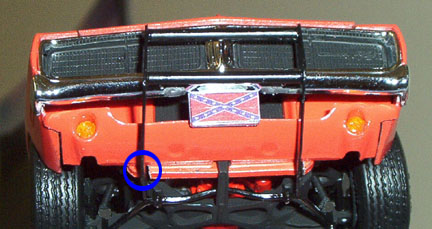
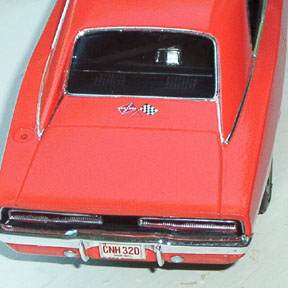
To
detail the taillight panel, paint above the bumper line
flat black. When dry, paint the chrome strip along the
top edge silver.
|
|
7.
|
After all paint is dry, spray Testors Gloss Cote
on body, hood, front valance and rear panel. Gloss Cote
over the flat black on the rear panel will give it a "satin"
look.
 |
|
8.
|
When
paint has dried completely, apply Bare Metal chrome foil
to the trim areas. Follow the directions on the package.
With some patience, it produces impressive results.
 |
|
9.
|
Paint underside of roof to match interior color,
and paint the underside of the hood and front inner fenders
gloss black. Paint both sides of the inner fenders (the
"under-hood" side and the outside, as seen when looking
into the wheel well.
|
|
10.
|
Carefully cut the "walrus teeth" off from either
side of the front license plate holder on the front bumper/grille
(part No. 7). Smooth out the area where they were cut,
and paint the scars silver (or cover with Bare Metal foil).
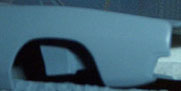
To
paint grille inserts flat black, first I masked the edges
with scotch tape, so the paint marker would only touch
the proper parts (see figure a).
Paint should cover the entire grille surface, including
the "cracks" around the edges (see figure b).
Optional: Before paint dries, use a toothpick
to clean paint off of grille trim and Charger emblem (see
figure c).
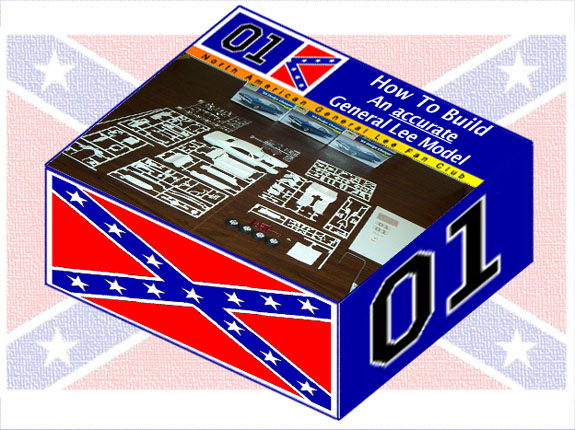
ASSEMBLY NOTE: When attaching front bumper to body later,
the bumper should be pushed back into the opening until
no chrome can be seen from the side of the car (except
for the side of the bumper) (see figure d). Photos
on the model box (kit #2546) are incorrect.
Figure a:
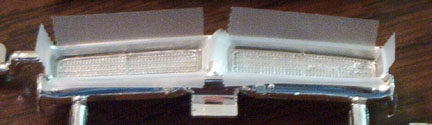
Figure b:
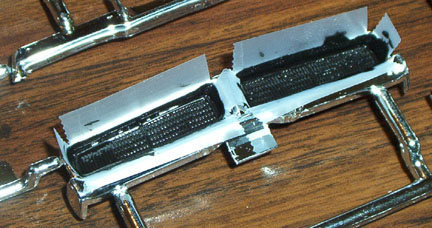
Figure c:

Figure d:
 |
|
|
|
1.
|
Trace two side pieces from template (right-click
here and
"save target as" to download) onto sheet of styrene and
carefully cut them out.
|
|
2.
|
Cut two pieces of styrene tubing to length indicated
on template and glue them to one side piece using the
circles on the template as a guide. Make sure tubing
is perpendicular to the side piece (to avoid a crooked
assembly).
|
|
3.
|
When
glue is completely cured, glue the other side piece to
the ends of the tubing, making sure assembly is straight.
 |
|
4.
|
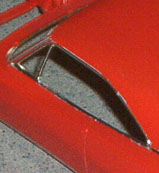
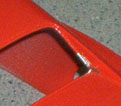
Cut
two notches in the bottom of the Radiator Core Support
(part No. 35). The notches should be about 3/16" long
and about 1/16" wide (see figure e). This will
provide clearance for the pushbar when mounting it to
the frame later (see figure f).
Figure e:
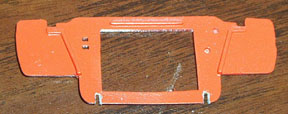
Figure f:
 |
D. ENGINE PREPARATION
Assemble per kit instructions, with the following
modifications:
|
|
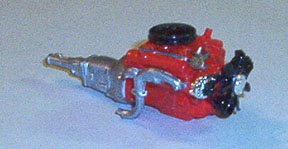
1.
|
Grind the top of the carburetor (part No. 44) and
the underside of the air cleaner (part No. 61) to provide
hood clearance (engine may be slightly too tall if this
is not done).
|
|
2.
|
Paint air cleaner silver or black, depending on
preference (silver was most often used on the show),
"Magnum" decal also optional.
|
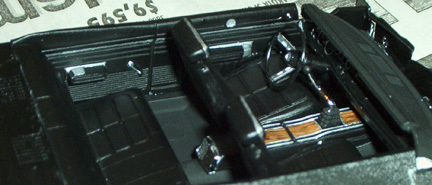
E. INTERIOR PREPARATION
Assemble per kit instructions,
with the following modifications:
|
|
1.
|
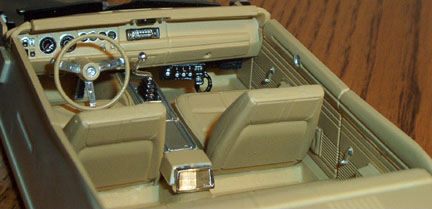
Interior note: Part No. 86 (Interior
Brace) does not need to be installed on this model. It
serves no purpose.
Spray all interior pieces (floor, console, dashboard top,
dashboard, steering wheel, steering column, seats, seat
backs, headrests and door panels) light sand. (Flat black
is also an option, but tan is the "official" General Lee
interior color). When
dry, spray seats, dashboard, console, door panels, steering
wheel and steering column with gloss cote for a vinyl
appearance.

|
|
2.
|
Apply decals 8 & 9 (speedometer & tachometer)
according to instructions. Paint black and silver details
on instrument panel. Use Bare Metal foil on chrome trim
along door panels and trim around armrests. Paint window
cranks, steering wheel sections, console tray and other
details silver, using a toothpick.
Option: Install CB radio under the passenger
side of the dash. The one pictured below is from a "Daisy's
Jeep" kit.
Option: If you choose to have a black
interior, a nice touch is a woodgrain console. On the
interior pictured below, I used vinyl woodgrain stickers
that came with a computer desk.
|
|
|
|
1.
|
Method 1: Trim the fire extinguisher
from the rollbar included with the Pro Modeler Charger
kit. Paint rollbar flat black.
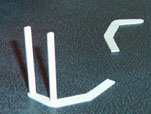
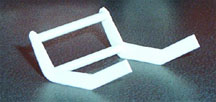
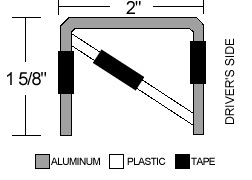
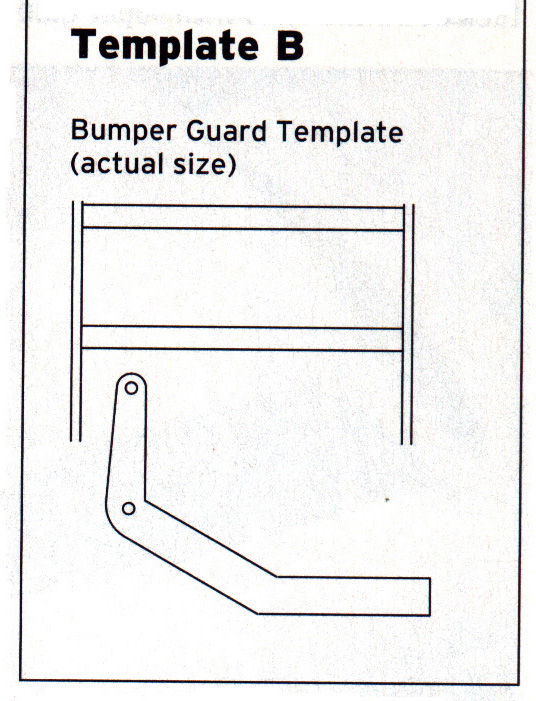
Method 2: Bend a piece of 1/8" diameter
solid aluminum rod (available at hobby stores) into shape,
according to rollbar template below. Cut a plastic
section off one of the part "trees" (they are approximately
the same diameter as the aluminum rod) to make a diagonal
brace. Fasten brace using silicone adhesive.
Rollbar Template
|
|
2.
|
Trim a piece of black electrical tape to about
1/2" wide and apply it to the driver's side of the rollbar,
about 1/4" from the top. Roll tape tightly around the
bar 2 or 3 times to simulate leather padding. Repeat
for the passenger side, applying tape just below where
the cross brace attaches. Roll a third, full-width (11/16")
piece around the cross brace, off-center toward passenger
side (see rollbar template above).
|
|
3.
|
Attach firewall, console, rear seat and door
panels to interior floor, per kit instructions, but
do not install front seats.
To install rollbar:
Method 1 (If using Pro Modeler kit with plastic rollbar
only): Locate the "shackles" (Parts No. 121)
that come with the Pro Modeler Charger. Attach each
one to the floor behind the front seats, and up against
the outer "ridge" in the floor. This will allow a "base"
for the Rollbar. Trim the pegs off the bottom of the
Rollbar (leaving the flat round bases). Cement the Rollbar
to the blocks.
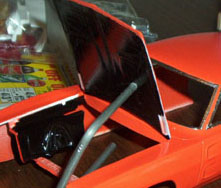
Method 2 (If using aluminum constructed rollbar
only): Paint the bottom of each leg of the rollbar
black (or white, if using a black interior), and set
the rollbar in place (as close to the front of the rear
seat as possible) while paint is still wet. This will
leave marks where the legs will go. Using a 7/64" drill
bit, drill holes through the floor on your two marks
(see figure g). Using a hobby knife, open holes
a little at a time until rollbar legs fit into holes
(see figure h).
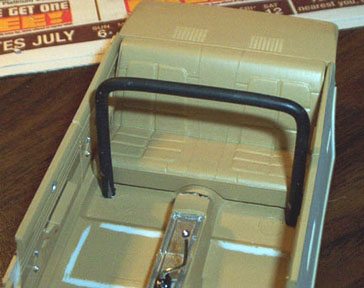
Remove rollbar and complete interior assembly, placing
the front seats as far forward as they will go.
When assembling interior section to chassis, use silicone
adhesive on the underside of the interior section, letting
adhesive get into rollbar holes. Place rollbar in holes
and adhere the interior section to the chassis. This
will anchor the rollbar in place.
Figure g:
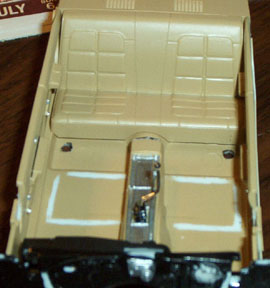
Figure h (cross brace and padding omitted in
photo):
|
G. SUSPENSION MODIFICATIONS
Assemble per kit instructions,
with the following modifications:
|
| The following steps need
to be done to achieve the proper stance that is legendary
with the General Lee. |
|
1.
|
Trim
the pegs off the front spindles (parts No. 69 & 70)
and the rear axle housing (part No. 73), leaving the large,
flat areas. Wheel backs from the Eckler Corvette will
glue directly to the flat areas of the spindles and rear
axle. |
|
2.
|
Build front suspension as per kit instructions,
BEFORE PAINTING suspension parts or chassis. Pieces
will fit much easier, and this will eliminate having
to scrape areas to be cemented. Cover the flat areas
of the spindles (where the wheels will be glued) with
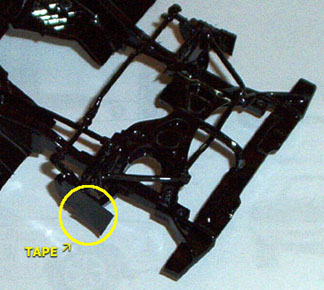
a piece of tape. After painting the chassis/front suspension
assembly, the tape can be removed to expose an unpainted
gluing surface (see pic below).
|
|
3.
|
Build rear suspension as per kit instructions,
but first, it's a good idea to fix a flaw in the model
kit:
Using a 1/16" drill bit, carefully drill new holes
in the leaf springs (parts No. 88) about 1/16" toward
the FRONT of the car, so when the Rear Axle Housing
(part No. 73) is attached, it sits closer to the front
of the car (this helps center the rear wheels in the
wheel wells) see pic below.

NOTE: The Drive Shaft (part No. 78) will need to be
shortened by 1/16" to allow for this adjustment. I simply
cut off the peg on the engine end of the drive shaft
and shaved the end down to the proper length.
|
|
4.
|
When cementing wheels to the front spindles and
rear axle, place model on its side. Scrape plating from
wheel backs, where they will contact the spindle/axle. Apply
cement generously to wheel back, and work glue repeatedly
with the edge of a toothpick until it becomes slightly
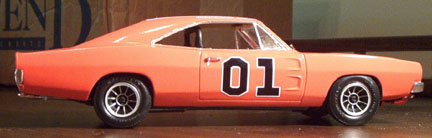
tacky. Place wheel in position, keeping top of rear
wheel barely visible below wheel well, and top of front
wheel just hidden above wheel well (see photo below
for correct stance). Make sure wheels are centered from
front to back in wheel wells. After one side is completely
cured, turn model over and repeat for other side.
Correct General Lee stance:
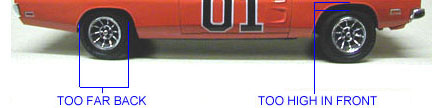
Older model, showing incorrect stance:
|
|
|
|
1.
|
Decals
For much more accurate, authentic-looking decals, order
the "01"s, Confederate Flag, Roof Lettering and Rear License
Plate decals from www.buildagenerallee.com. Specify
which decals you would like (i.e. Flag, 01s, Rear License
Plate). The flag is available in royal blue and navy blue
(earlier episode version).
For
the "General Lee" roof lettering, I designed the decal
on Photoshop with the proper size and font, and took my
design to my local sign shop. They printed the design
on clear decals.

|
|
2.
|
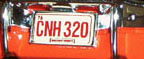
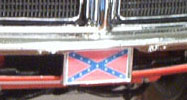
For the front Confederate Flag license plate decal,
I downloaded a picture of the flag from the internet
and re-sized it to measure roughly 1/2" wide by 1/4"
tall. I printed it on adhesive label paper and covered
it with a clear laminating sheet. You can then just
cut, peel and stick the decal to the front license plate.
|
|
3.
|
Optional:
If you are building a replica of the "first episode" Georgia
General Lee, that car had a "crossed flags" decal behind
the rear window. You can specify this in your order to
www.buildagenerallee.com, and they will include one.
 |
|
|

